How to fix an artificial hedge to a fence?
 2024 06 21
Got an unattractive old fence ruining the aesthetics of your yard?
You’ve probably stared at that lacklustre barrier day and night, pondering how to transform it into a standout feature.
Well, wonder no more! In this blog, we’ll reveal the secret: installing artificial hedges on any type of fence material. Say goodbye to dull and hello to fabulous!
Let’s dive in.
How to Install Artificial Hedges onto a Wooden Fence?
1. Effortlessly connect the hedge panels using the easy-snap-to-lock system. Only a few simple steps are needed to secure the panels together.

2. Cut the panels to the exact size needed—our panels are designed for easy resizing.
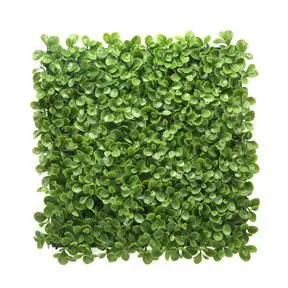
3. Staple the boxwood mat, or any other hedge design or vertical garden, directly onto the fence by securing the plastic matting to the surface.

4. Trim any excess with scissors, ensuring a straight cut.
How to Install Artificial Hedges onto a Metal Fence?

1. Clean the Fence: Ensure the metal fence is clean and free of any debris. This will help the zip ties hold better and make the installation easier.
2. Attach the Panels: Starting at one end of the fence, hold the first panel up against the fence. Use zip ties or cable ties to secure the artificial plant panel to the fence. Place zip ties at regular intervals along the top, middle, and bottom of the panel for stability. Tighten the zip ties firmly but be careful not to over-tighten and damage the hedge panel.
3. Continue Adding Panels: Once the first panel is secure, position the next panel beside it. Ensure there is no gap between the panels for a seamless look. Use zip ties to attach the panel in the same manner. Repeat this process until the entire fence is covered.
4. Trim Excess Zip Tie Ends: After securing all the hedge panels or vertical garden / green wall, use wire cutters to trim off the excess ends of the zip ties for a neat appearance.
5. Check for Stability: Once all panels are installed, check the entire fence for any loose areas. Add additional zip ties if necessary to ensure all panels are securely attached.
6. Final Adjustments: Make any final adjustments to the positioning of the artificial hedge or green wall. Ensure that they are all straight and aligned properly.
How to Install Artificial Hedges onto a Cement Sheet Fence?

1. Gather Materials and Tools: Ensure you have a drill, a cement sheet drill bit, cement sheet screws, and washers ready.
2. Start with the First Panel:
- Begin at the top corner of your cement sheet fence.
- Drill a hole in the top corner.
- Hold the green wall panel in place and insert a screw through the washer, ensuring the washer covers the backing mesh of the panel.
3. Continue Attaching the Panel: Secure the vertical garden panel by drilling and screwing at regular intervals along the panel.
4. Attach Subsequent Panels:
- Clip the next panel to the installed one using the lugs on the panels.
- Secure with screws and washers at regular intervals.
- Repeat the process, working your way down the wall.
- If the panels are too long, trim the excess with scissors.
5. Check and Secure Panels: Once the artificial green walls are installed, gently pull on them to ensure they are secure. Add additional screws and washers to any sections that bulge or feel loose.
By following these steps, you can successfully install artificial hedges on any type of fence, creating a lush, green appearance with ease.